
Step-by-Step guide to implement and leverage Social Login with Keycloak
Sanjay Naik

Jul 29,
2020 |
Posted in
Digital Commerce
Struck by the pandemic there are more companies that want to leverage e-commerce to grab market share and growing online businesses.
As the number of websites increases it is resulting in the users increasingly having to register on every website resulting in painful experience. Studies indicate more than 80% of users are bothered by the need to register or sign up on websites whereas 88% of users fill incorrect data in registration forms. Both of these problems adversely affect businesses. Adding to this, users often experience password fatigue as they have to remember password for various different applications & websites.
- It offers convenience to users by allowing a single social account to be used across multiple e-commerce websites for registration which leads to more successful signups.
- It drastically reduces cart abandonment & increases the rate of conversion owing to its convenient sign in & registration process.
- Social login also makes it easier to personalize content and marketing activities tailored to a particular segment of audience helping brands advertise in more profitable and efficient way.
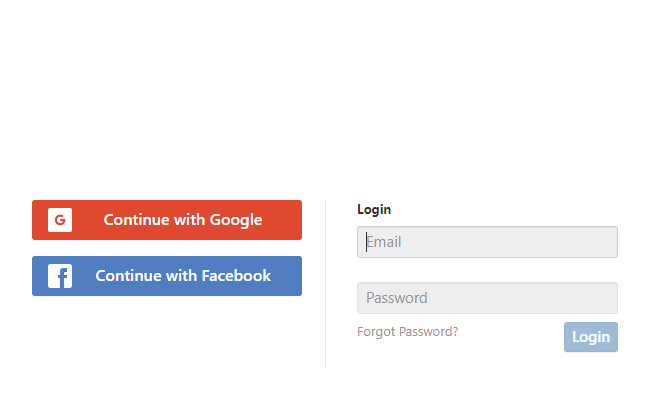
Social login is a single sign-on(SSO) technology which uses existing user’s information from social networking service such as Facebook or Google to sign into a third party application or website instead of registering separately. It can be implemented with the help of an authentication scheme known as OAuth2.
Also read: Top 6 Reasons Why Omnichannel Strategy Is Important For Boosting ECommerce Sales
What is OAuth2?
The OAuth 2.0 is the industry-standard protocol for authorization that enables application (third party) to obtain limited access to an HTTP service on behalf of a resource owner by allowing the application to obtain access on owner’s behalf.
OAuth 2 enables applications to obtain limited access to user accounts on an HTTP service, such as Facebook, GitHub and Google. OAuth delegates user authentication to services that hosts the user account such as google or Facebook and authorizing to third-party applications to access the user account.
Resource Owner: The entity who is capable of authorizing an application to access their account. Applications access to users account is determined by the authorization’s scope
Also read: 5 ECommerce Marketing Trends That Cannot Be Avoided In 2021
Resource or Authorization Server: Resource server hosts the protected user’s accounts and has the responsibility of verifying the identity of the user.
Client: It refers to the application that accesses the user’s account authorized by the user and the authorization process goes through a validation process carried by an API.

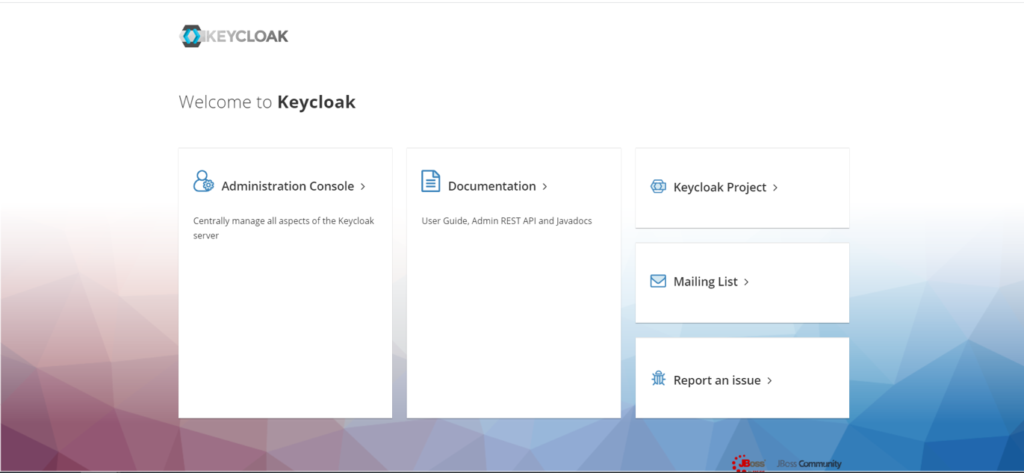
What is keycloak?
Keycloak is an open source Identity and Access Management solution aimed at modern applications and services. It makes it easy to secure applications with minimal code. It offers features such as
- Single sign-on
- Authentication
- Authorization
- Social login
- Multifactor authentication
- Centralised user management
Keycloak enables applications to skip login forms, user authentication and storing user’s data as users authenticate with Keycloak rather than in each application separately.
Also read: Key Customer Experience (CX) Strategies To Drive Conversions On Your ECommerce Website
Keycloak is Identity Broker meaning it is an intermediary service that connects multiple service providers with different identity providers. As an intermediary service, the identity broker is responsible for creating a trust relationship with an external identity provider in order to use its identities to access internal services exposed by service providers.
Users can also log-out at once from all applications used by keycloak with single-sign out feature of Keycloak.
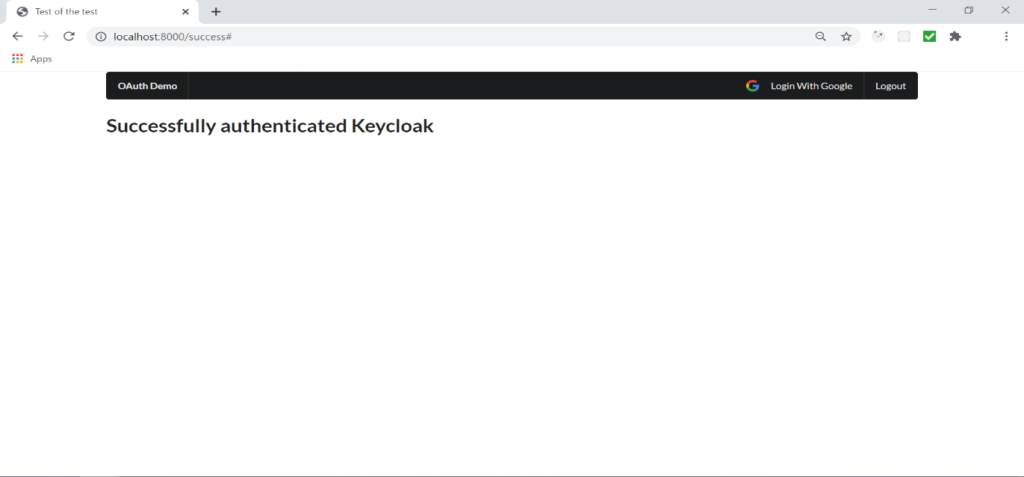
Express Application
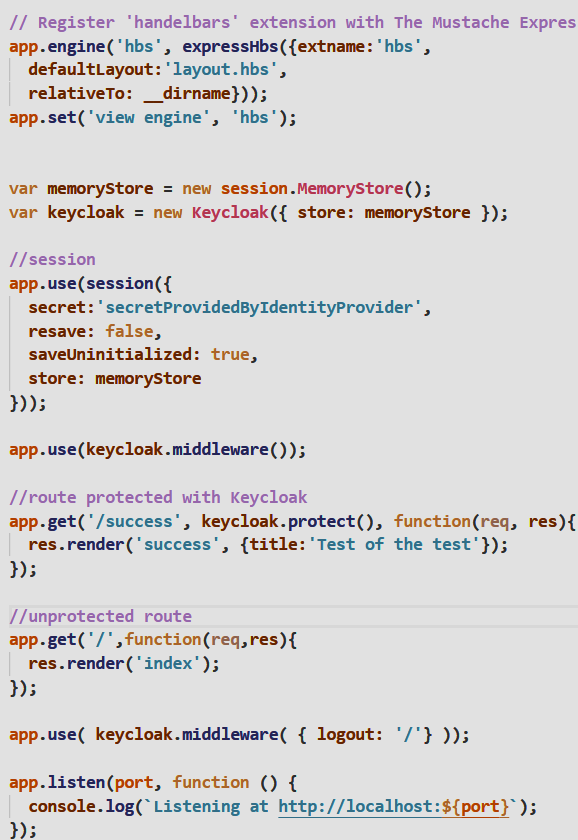
This Express app uses Keycloak to protect the “/success” route. The default route “/ “is unprotected. The “/logout” route kills the keycloak session. Login and user setup is controlled by keycloak.
1. Default route

2. Success Route
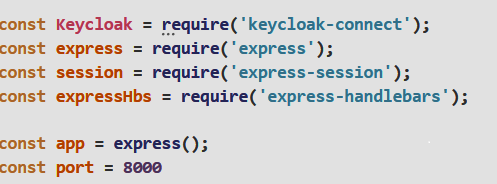
Keycloak-connect and express-sessions must be imported in express application along with express handlebars.
Session must be configured to use memoryStore & Keycloak middleware is setup to use the session memoryStore.
Also read: Driving Transformation Outcomes Through Your Marketing Automation Tool
Now keycloak.protect() can be used to protect the routes. Following is the full implementation of server.
Setup Keycloak Server
Keycloak server is needed to be up and running to use this application.
Download Keycloak at http://www.keycloak.org/downloads.html .To run it locally unzip the downloaded file and run standalone.bat.
This command will start the keycloak server and to access it from browser we need to hit

Which will open the keycloak administrator
Click on administration console
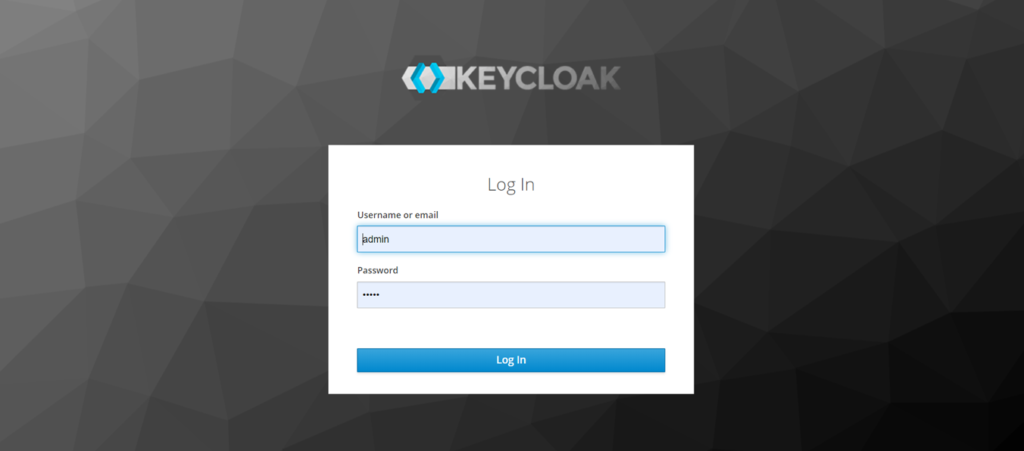
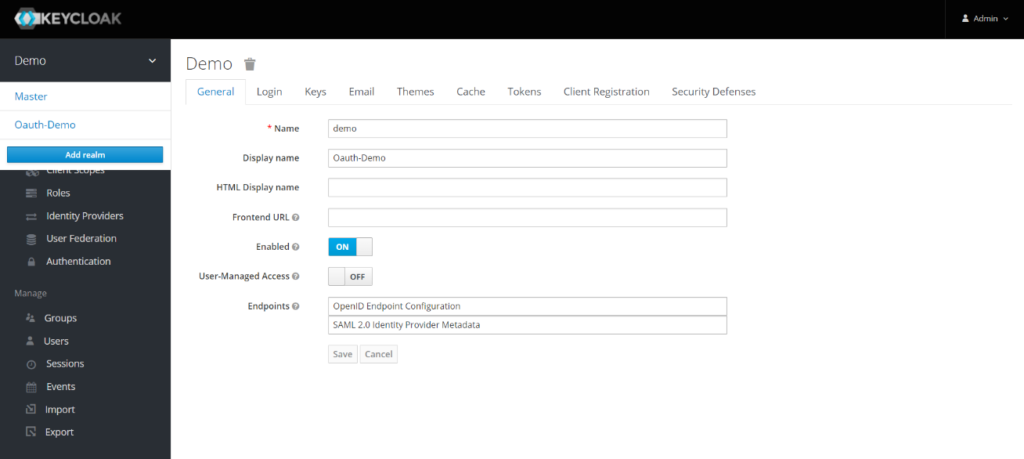
And login using previously created username and password. Now for setting up realm we need to click on master drop down menu in top left of the screen and click Add realm & create a realm. If user is logged into master realm this drop down menu lists all the existing realms.
Now create a client of the express application in the Keycloak Administration Console and setup client.
Client will need a valid redirect URI to redirect user after successful authorization.

This image has an empty alt attribute; its file name is Social-login-keycloak-image-14-1024×143.png
After creating the client go to installation tab. From the drop down menu of format options select Keycloak OIDC JSON and click on download to download keycloak.json. Put this file in the root directory of your project.
Configuring keycloak for Social login
Keycloak provides the feature of social login to set up social login in keycloak it provides a documentation which explains the different types of social logins and steps for setting them.
Here is the google social login with keycloak:
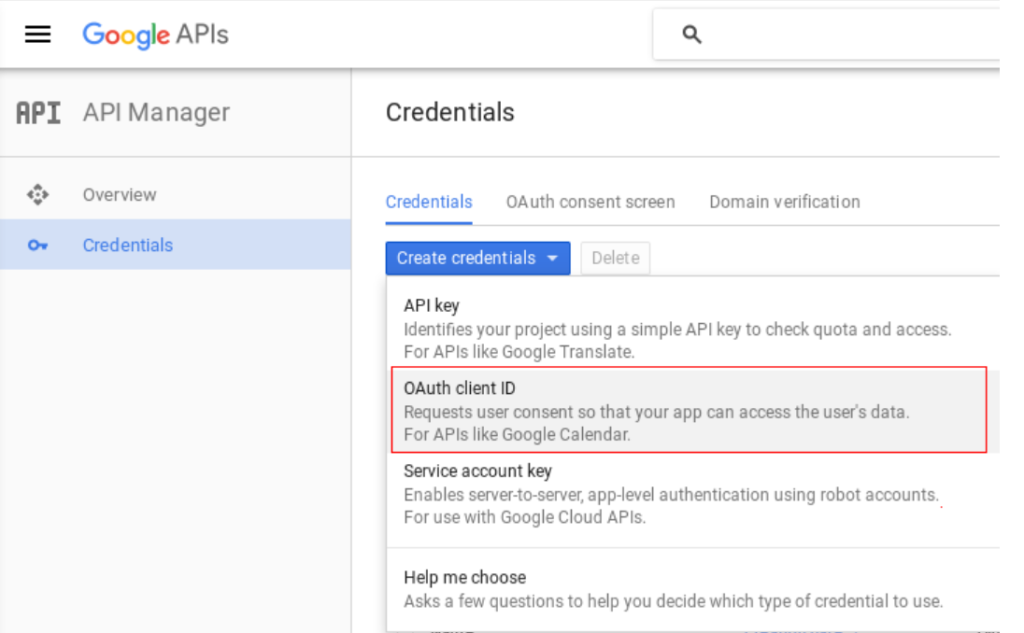
- Create a new application on googles API portal https://console.developers.google.com/
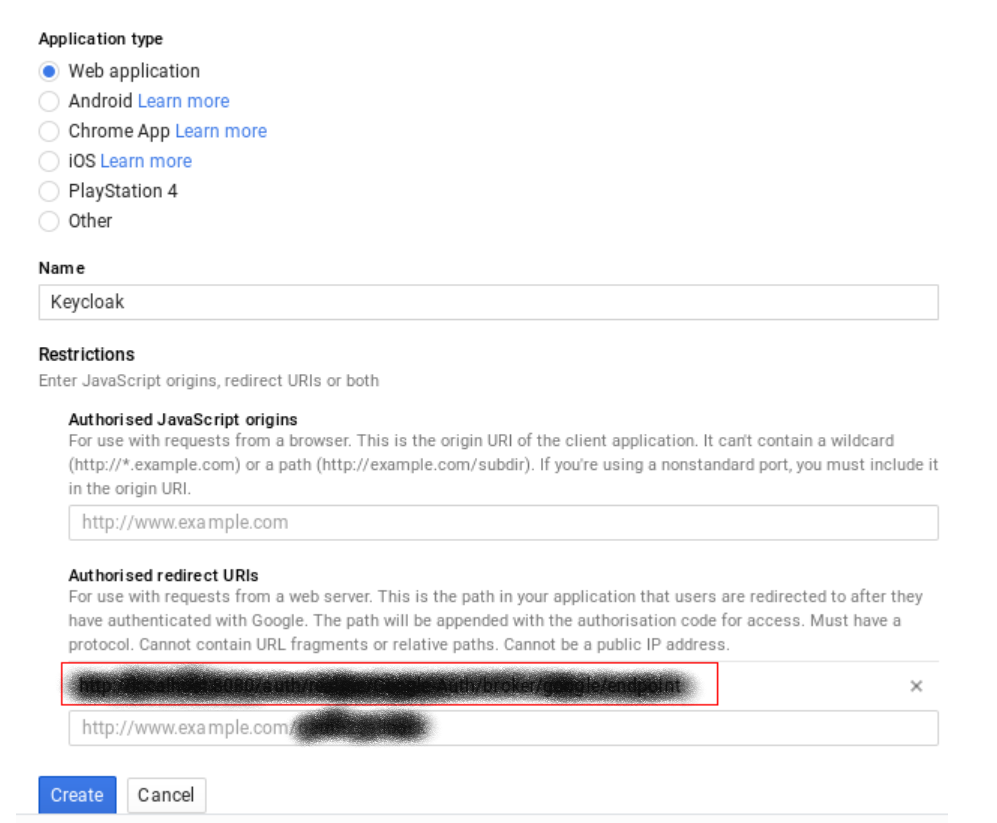
Click on the Create Credentials button and from drop down choose OAuth Client ID.
Select Web application as Application type in the following window and in the Authorized Redirect URI specify the Keycloak URI.
-
- After clicking create Client id and secret will be created copy both and save them in a secure place.
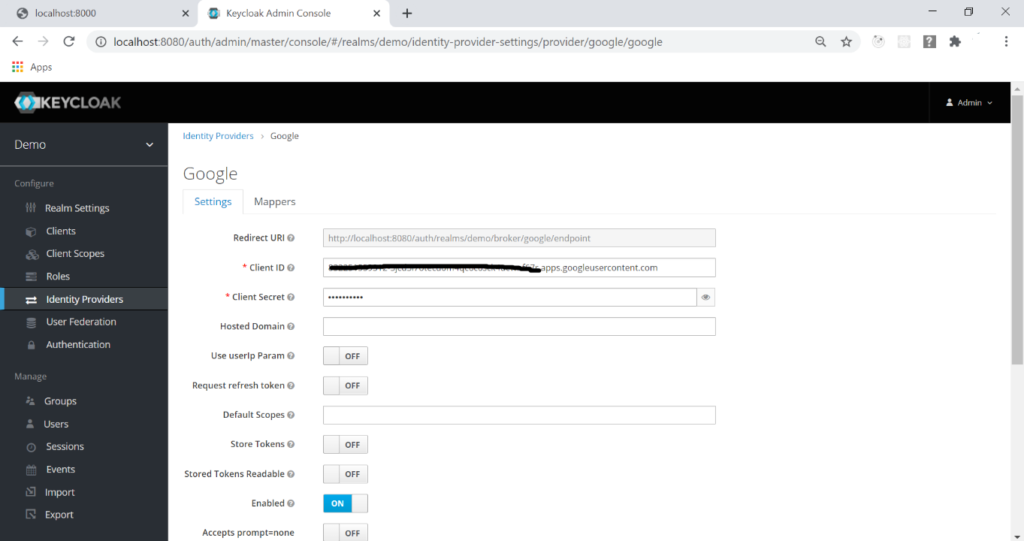
- Now go to keycloak Admin console and click in identity provider then click on Add provider and select Google as identity provider then paste the client Id and secret that was just created.
Follow the link for more information on social logins in keycloak https://www.keycloak.org/docs/latest/server_admin/index.html#social-identity-providers.